If you live in Central Oregon, you need the right air conditioner installation to keep your home cool and comfortable during the summertime. Each structure is different, so it’s important to take the time to find an air conditioner that is right for your home. From central air conditioners to ductless mini-splits, there are several AC replacement options you can get.
The best type of air conditioner depends on your home and how you want to use it. Central AC is often a good fit for whole-home cooling when suitable ductwork is already in place, while ductless mini-splits work well for homes without ducts or where individual zoning is important. Heat pumps provide both heating and cooling, window units are practical for individual rooms, and portable ACs are generally better suited to temporary or supplemental cooling.
Key Takeaways
The best type of air conditioner depends on your home’s ductwork, layout, cooling needs, heating needs, and budget.
Central AC is often a good fit for whole-home cooling when suitable ductwork is already installed.
Ductless mini-splits work well for homes without ductwork or when individual room or zone control is a priority.
Heat pumps are worth considering if you want one system that provides both heating and cooling.
Window and portable ACs are generally better suited to individual rooms, supplemental cooling, or temporary needs.
Proper AC sizing requires a professional cooling-load calculation; square footage alone isn’t enough for selecting a whole-home system.
Compare SEER2, installation quality, noise, zoning, maintenance, warranty, and total ownership cost rather than choosing an AC based only on price or efficiency rating.
What Are the Basic Types of Air Conditioners?
While there are a handful of major types of air conditioners, there are many subtypes to choose from. There are different brands, features, and add-ons available, so take your time to research which option works best for your family. At Central Oregon Cooling, we can walk you through the different types so that you can find a new AC installation for your home.
Central Air Conditioners
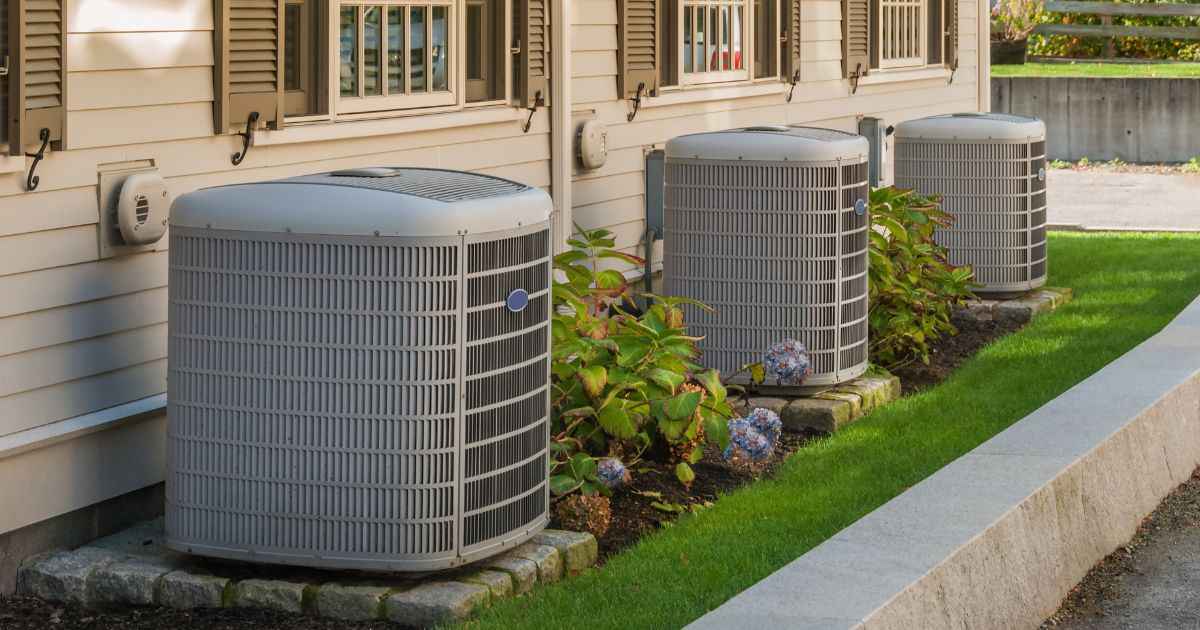
When most people think about air conditioning, they generally think about central air conditioners. These air conditioners consist of an indoor unit, an outdoor unit, and a network of ductwork. With the help of refrigerant, heat is transferred from inside your home to the outside air.
Central air conditioners are quite efficient, but they can be difficult to install in a home that doesn’t have existing ductwork. They also have a higher upfront cost than a basic window unit. However, they are excellent at keeping the interior of your home as cool and comfortable as possible.
Pros of Central Air Conditioners
Ensures consistent, even temperatures
Provides filtered air
Works well with smart thermostats
Operates quietly
Offers an unobtrusive design
Cons of Central Air Conditioners
Costs more for electricity if you wouldn’t normally be cooling every room of your house
Requires ductwork
Offers limited control of different zones
Higher upfront installation costs
Ductless Mini-Splits
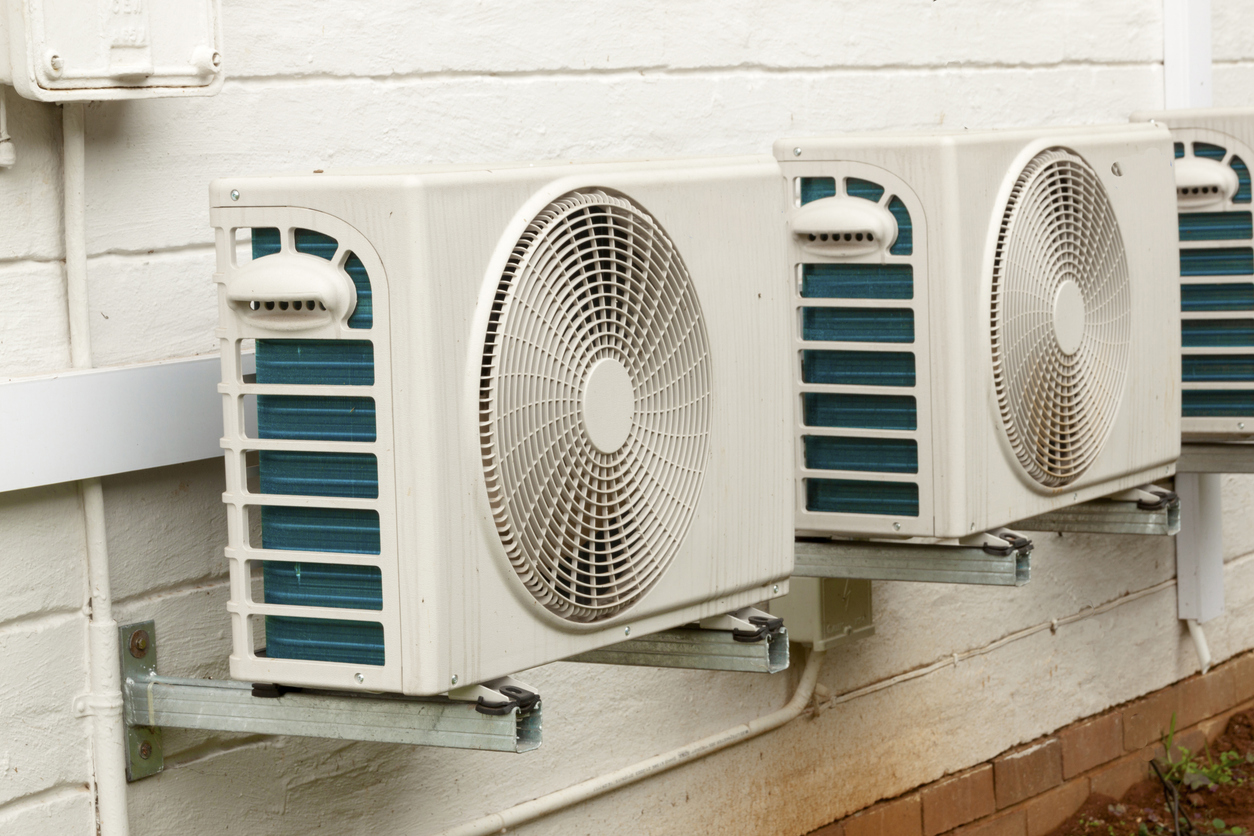
If you’re considering different AC types, you can also talk to one of our AC installation contractors about getting ductless mini-splits. This type of air conditioner is extremely popular in buildings that don’t have existing ductwork. Instead of outfitting an entire home, you can install ductless mini-splits in individual rooms.
While these are a great choice if you want zoned control without needing any ductwork, central air conditioning may be a better choice if you have existing ductwork. Ductless systems require a wall penetration for the refrigerant lines, electrical wiring, and condensate drainage, but the exact installation requirements vary by equipment and home configuration.
Plus, ductless mini-splits don’t have to be installed right next to the outdoor unit. Allowable line-set lengths and the distance between indoor and outdoor equipment vary by manufacturer and system design.
Pros of Ductless Mini-Splits
Provides flexibility
Has a small size
Offers zonal control of individual rooms
Doesn’t have to be placed in every room
More energy efficient than window units
Provides ideal coverage for studios and small spaces
Cons of Ductless Mini-Splits
Visible in each room
Requires a place to drain the condensate water
Performance and installed cost depend on equipment selection, outdoor conditions, number of indoor units, home layout, and installation requirements.
Heat Pumps
A heat pump is another important option for Central Oregon homeowners because it can provide both cooling and heating. During summer, it works similarly to an air conditioner by transferring heat from inside the home to the outdoors. In cooler weather, the process reverses to provide heating.
Heat pumps are available in ducted and ductless configurations, making them suitable for different home layouts. They can be particularly worth considering when you’re replacing both cooling and heating equipment or want one system that handles year-round comfort. System selection should account for home heating and cooling loads, existing ductwork, electrical requirements, and cold-weather performance.
Portable Air Conditioners
A portable air conditioner is an individual unit that you can easily move from room to room. It does not have the same cooling capacity as central air conditioning units or ductless mini-splits. In most cases, a portable air conditioner will be able to cool a small- to normal-sized room. If you try to cool a larger area than that, it won’t work effectively.
However, the small size and portable nature are ideal if you live in an apartment. If you know that you’ll be moving to a different house in the future, it may be better to buy a portable unit that you can bring with you.
Pros of Portable Air Conditioners
Costs less upfront
Can be installed on your own
Rolls easily to different rooms
Can be moved from one rental to another
Cons of Portable Air Conditioners
Uses energy less efficiently than other types of ACs
May need to have water drained frequently, depending on the settings and location
Can’t handle large spaces
May not be powerful enough to keep up with extremely hot days
Must be near a window to vent heat outdoors
Creates a lot more noise than ductless mini-splits or central air conditioners
Window Units
As you consider your AC maintenance and installation needs, you may also want to look into getting window units. While these units are similar to portable ACs, there is a key difference. Instead of being placed on the floor of a room, window units are installed in the window itself.
Like portable ACs, window units create heat that has to be vented into the outside air. The location makes this venting process easier. However, your homeowners’ association or landlord may have specific rules about window units. Because they are installed in your window, they can’t be moved to a new home as easily as portable air conditioners.
Pros of Window Units
Works well for small spaces
Costs less to install
Can be transported if you move to a new apartment
Cons of Window Units
Cools ineffectively in large spaces
Produces a louder noise than central air conditioners
Can’t be used in multiple rooms
May not be allowed in certain apartment buildings or homeowners’ associations
How to Decide Which Type of AC Is Right for You?
When deciding which type of AC unit you should get, you should look at a number of factors. For example, you may want to look at how air conditioning repair costs change for different AC types. New AC installation costs and space requirements will also vary.
If you’re not sure what you’re looking for in your next AC, you can always talk to an AC installation contractor at Central Oregon Cooling. We can help you understand the different types of ACs and the benefits of each model.
Consider the BTU Range
One of the most important factors when looking at an AC is the British Thermal Units (BTUs). Basically, this figure can tell you what the cooling capacity of your air conditioning system is.
In general, the number of BTUs you need is 20 times the square footage of the area you want to cool. However, this figure can vary based on where you’re located, your home’s insulation, personal preferences, and other factors.
Get the AC Sizing Right
Whole-home AC sizing shouldn’t be based on square footage alone. A professional cooling-load calculation considers factors such as home size and layout, insulation, air leakage, window size and orientation, sun exposure, local conditions, and other sources of heat gain.
An undersized air conditioner may struggle to maintain the desired temperature during higher cooling loads. An oversized system can cycle on and off too frequently, which may affect comfort, efficiency, humidity control, and equipment performance.
BTU-based room-sizing guidance can still be useful when comparing window or portable air conditioners, but whole-home central AC, heat pump, and ductless systems should be properly sized for the home’s actual cooling load.
Compare Efficiency and Comfort Features
For central ACs and heat pumps, compare the system’s SEER2 efficiency rating along with how the equipment operates. Higher-efficiency equipment can reduce energy use under the right conditions, but the highest SEER2 rating isn’t automatically the best value for every home.
Inverter and variable-speed systems can adjust output as cooling demand changes instead of operating only at full capacity. Depending on the equipment and installation, this can support more consistent temperatures, quieter operation, and improved efficiency.
Look at Your Cooling Needs
Next, you should consider your personal cooling needs. Do you need around-the-clock air conditioning? Or, are you just looking for a little cooling on the hottest days of the year?
You should also think about your family’s needs. Often, people feel comfortable at different temperature levels. If two of your family members prefer drastically different temperatures, you may want to consider getting ductless mini-splits.
Also consider the condition of existing ductwork, home layout, insulation, window performance and sun exposure, preferred noise levels, zoning needs, and whether you also need new heating equipment. These factors can change which AC type makes the most sense even for homes of similar size.
Review the Installation Requirements
Before you get an air conditioner, you should check out the AC tune-up, maintenance, repair, and installation requirements for each unit you’re considering. When it comes to air conditioner installation costs, the price can vary significantly.
Many homeowners can install portable ACs and window units in their homes. In comparison, ductless mini-splits and central air conditioners generally require a professional technician to do the installation work.
If you already have ducts, central air conditioners are quick to install. The price and time commitment are much higher if you don’t have ductwork installed already.
Check Out the Maintenance Needs
Next, you should also consider the AC maintenance needs of different systems. Maintenance requirements vary by equipment type and manufacturer. Central ACs, heat pumps, ductless systems, window units, and portable ACs don’t all have identical maintenance needs. Follow the manufacturer’s filter and maintenance recommendations, and schedule professional HVAC maintenance at the intervals appropriate for your installed system.
Research the Cost
Whether you’re looking at 24-hour AC repair or ductwork installation expenses, getting an air conditioner is an investment. AC lifespan varies based on equipment, installation quality, usage, climate, maintenance history, and operating conditions. Consider expected maintenance and repair needs alongside upfront cost when comparing systems.
While the upfront cost is a necessary consideration, you should look at the average cost of maintaining it, how frequently you’ll have to replace the unit, and the amount you’ll spend on electricity. Higher-efficiency equipment may reduce cooling energy use, but actual savings depend on the system being replaced, equipment efficiency, sizing, installation quality, usage, utility rates, and home conditions. Compare total ownership costs rather than efficiency ratings alone.
Additionally, you can always talk to your AC installation contractor about current promotions and financing options. There are many different ways to make the overall cost more reasonable so that you can afford a unit that meets your comfort needs, home size, and energy-efficiency goals.
Analyze the Brand and Features
Finally, you should consider the features associated with each unit and the various brands. For example, some air conditioners come with smart thermostats that allow you to program your cooling preferences for each time of the day. You may also want dehumidifiers, humidifiers, or air purifiers incorporated into your system.
What to Compare Before Buying an AC
Before choosing an air conditioner, compare more than the equipment’s price or brand. Important factors include:
Professional cooling-load calculation and proper system sizing
Condition and design of existing ductwork
SEER2 and equipment operating characteristics
Installation quality and contractor experience
Noise levels
Zoning and control options
Warranty coverage
Maintenance requirements
Heating needs if considering a heat pump
Upfront cost and expected total ownership costs
An HVAC professional can evaluate these factors together rather than recommending equipment based only on square footage or brand.
Frequently Asked Questions
What is the best type of air conditioner for a home?
There isn’t one best AC for every home. Central AC can work well with suitable ductwork, ductless mini-splits provide flexible zoning without ducts, and heat pumps are worth considering when both heating and cooling are needed.
Is central air better than a ductless mini-split?
It depends on the home. Central AC is often practical when suitable ductwork already exists, while ductless systems can be advantageous for homes without ducts or spaces requiring individual temperature control.
What is the best AC for a house without ductwork?
Ductless mini-splits are one of the primary whole-home or multi-zone options for homes without existing ducts. Heat pumps are also available in ductless configurations.
How do I know what size AC I need?
Whole-home AC sizing should be based on a professional cooling-load calculation rather than square footage alone. Insulation, windows, air leakage, sun exposure, layout, and other factors affect cooling demand.
Is a heat pump better than an air conditioner?
A heat pump provides heating and cooling, while a conventional central AC provides cooling. Which is better depends on your existing heating system, home, climate needs, installation requirements, and budget.
What should I compare when buying a new AC?
Compare sizing, ductwork, efficiency, installation quality, noise, controls, warranty, maintenance requirements, heating needs, and total ownership cost.
Discover the Best Type of Air Conditioner for Your Home
Whether you simply want to cool a studio apartment or need central air conditioning for an entire ranch, there are different air conditioner installation options available for your needs. The best type of air conditioner for your Central Oregon home depends on its cooling load, ductwork, layout, comfort preferences, heating needs, efficiency goals, and budget. Replacing an older system with properly sized, efficiently installed equipment may improve comfort and efficiency, but results depend on the home and equipment being replaced.
Plus, new ACs are less likely to break down than older models, so investing in an AC replacement can lower the amount you have to spend on repairs.
If getting a new air conditioning installation feels daunting, we can help you explore all of the options available for your home. Central Oregon Heating, Cooling, Plumbing & Electrical can evaluate your Bend or Redmond home, compare central AC, ductless, and heat pump options, and recommend a properly sized system for your needs. Contact our team to schedule an AC installation or replacement consultation.
On a hot day, nothing inspires panic like an AC that doesn’t blow cold air. Even with the best maintenance, there are times when you may need air conditioning repair services. With the right AC maintenance and repairs, you can prevent the underlying problem from becoming worse and enjoy a cooler, more comfortable home.
Overview:
The most common reasons why an AC doesn’t blow cold air are a dirty air filter, incorrect thermostat settings, a frozen evaporator coil, low refrigerant, a dirty condenser coil, a faulty capacitor, leaky or blocked ductwork, blocked return vents, or compressor issues. While some of these problems can be checked by homeowners, electrical and refrigerant repairs should only be dealt with by a professional.
Common Symptoms and Possible Causes
There are several different reasons why an AC might stop blowing cold air. By analyzing the symptoms involved, you can narrow down the potential cause of your problem.
Symptom
Cause
The AC runs but blows warm air
This often occurs due to low refrigerant or compressor problems.
Weak airflow
Poor airflow is a sign of dirty air filters and blocked ducts.
Ice on refrigerant lines
If the refrigerant lines get iced up, you likely have a frozen evaporator coil.
Indoor water leaks
A clogged condensate drain line can cause the drain pan to overflow.
Loud buzzing or humming noises
These sounds can occur if there is an electrical or capacitor issue.
Uneven cooling
Any duct leaks or airflow restrictions can result in uneven cooling.
Long runtimes
If the AC seems to run nonstop, you may be experiencing low refrigerant levels, an undersized system, or dirty coils.
10 Common Reasons Why Your AC Might Not Blow Cold Air
If your home feels unusually warm, check the vents for cool air. When ACs stop blowing cold air, the following AC repair issues may be at fault.
1. Low Refrigerant Levels
When your refrigerant level is low, you may notice the following symptoms:
A frozen AC
Ice around the lines and coils
Warm air coming from your vents
Hissing or bubbling noises
If you have low refrigerant levels, you need professional AC repair services in your area. The Environmental Protection Agency (EPA) requires technicians to get a Section 608 certification to recharge refrigerant. Because refrigerants impact the environment and human health, you don’t want to leave this problem untreated.
2. Clogged Drain Pipes
Air conditioners are designed to pull moisture from the air. Then, the excess water is supposed to drain out of your machine using the condensate drain pipe. If this drain gets clogged by dirt and debris, water will stop draining, causing the AC to shut down as a fail-safe measure.
Luckily, this is one of the easiest air conditioner maintenance tasks to perform. You can clean out the drain pipe on your own or call a 24-hour air conditioning repair company to remove the clogs for you.
3. Dirty Filters
Your AC may have more than one filter. You’ll most likely have one filter in your return vent and another in your air handler. If your filters become clogged, it limits airflow and stops your filter from working properly, causing the air conditioner to not blow cold air but run.
How often you need to change or clean the air filters depends on the manufacturer. While 30 days is a common frequency, some air filters don’t need to be changed for 60 or 90 days.
It’s important to use clean air filters because dirty filters put added strain on your AC. Eventually, this strain can cause your AC to break down prematurely.
4. Power Issues
If there are any power issues, it could prevent your AC from working correctly. For example, broken wires could prevent the air conditioner from getting enough electricity.
When you’re dealing with electrical issues, it’s a good idea to shut off your AC until you can get emergency air conditioner repairs. Damaged wires and other electrical problems can be dangerous, so it’s important to leave these tasks to professional HVAC repair services.
5. Blocked Returns
Your air conditioner doesn’t just have vents to release cool air into your home. It also has vents that bring in air, which are known as returns. Normally, returns are placed in a central location in your house so that they can circulate air.
However, you’ll sometimes see multiple vents in a single room. One of these vents may be a return. If the return vent isn’t blowing cold air, it’s because it isn’t supposed to. Returns are designed to bring air in, not out.
Sometimes, returns can get blocked by furniture, plants, or other items. When this happens, it prevents them from working properly. From time to time, check to see if your returns are blocked in any way. You should also clean the return and the filter inside it regularly.
6. Tripped Circuit Breaker
Don’t be hasty about scheduling a new air conditioner installation. The issue with your AC could be as simple as a tripped circuit breaker, which is easy to fix.
Typically, air conditioners use an inside and outside breaker. If the outside breaker trips, the vents will still work but will blow warm air. In many cases, fixing a tripped circuit breaker is as easy as flipping a switch.
However, it’s important to pay attention to how often your AC trips the breaker. If this is a frequent problem, there may be an underlying cause. Faulty compressors, dirty air filters, broken coil fans, and refrigerant leaks can all trip the breaker. In some cases, you may even need to get an air conditioner replacement.
7. Damaged or Clogged Ducts
As you troubleshoot your AC repair needs, check the vents in each room. If some of the vents are able to blow cold air, your air conditioning unit is likely working fine. Instead, you may be dealing with a duct-related issue.
When your ducts become dirty or clogged, it prevents cold air from getting where it needs to go. Instead of reaching your rooms, the air could be spilling out into your attic or a different space.
Sometimes, duct-related problems are caused by a lack of pressure. If there’s not enough pressure in the ducts, they won’t be able to move air to your rooms. Issues with your blower fan can also prevent air from reaching distant rooms.
Other than inspecting ducts for clogs, you can troubleshoot duct issues by checking vents to see if air is reaching every one of your rooms. To prevent air leaks and improve your AC efficiency, make sure your ducts are adequately sealed.
8. Dirty Compressor or Evaporator Coils
Your compressor and evaporator coils are integral parts of your AC. Occasionally, you may need to call for air conditioning repair services to fix the coils. Sometimes, the problem is as simple as removing excess dirt, dust, or debris from the coils.
Cleaning Your Compressor Coils
Unlike the evaporator coils, your compressor is located outside your house. The compressor coils are intended to help your AC cool the air. However, the outdoor location means compressor coils can easily become dirty or clogged with plant matter.
Luckily, you can easily inspect your compressor coils by looking at them. You should never touch them without gloves on because the coil fins are quite sharp.
If the compressor coils are dirty, you can clean them by turning off the AC’s power. Then, use the water hose to remove dirt, dust, and weeds. An HVAC technician can do a more thorough cleaning during your routine AC maintenance.
Fixing Dirty Evaporator Coils
Anything that makes it past your air filter can end up clogging your evaporator coils. Before opening any panels to check on them, it’s important to turn off your AC at the breaker box. It’s generally better to leave evaporator coil inspections to the professionals because these coils are situated behind a service panel.
There are often lines in front of the evaporator coils, and these lines must be dealt with carefully. The fins are especially sharp, so you should wear gloves when working around them. A vacuum cleaner with a soft brush attachment can be used to remove debris and dirt that are near the surface of the coils. For an even cleaner result, an HVAC technician can use a special spray cleaner and brush.
9. Broken Capacitor
The capacitor is normally responsible for sending a surge of electricity into your air conditioner to start it. These metal cylinders are located under the service panel in your outdoor AC unit. You should never deal with a faulty capacitor on your own. It stores a large amount of electricity, so you’ll get a horrible shock if you touch it. The capacitor must always be discharged before it can be handled in any way.
If you notice any leaks, ruptures, or bulges, your capacitor may need to be replaced. You can normally tell if there is a broken capacitor because you’ll stop receiving cold air. Additionally, you might hear a humming noise or smell something burning.
When the capacitor is broken, it’s important to call an HVAC company to replace the AC and provide repair services. A broken capacitor is capable of melting plastic and causing damage to other parts, so you need to get it fixed right away.
10. Thermostat Problems
Before you start looking for the best air conditioning installation in your area, it’s important to troubleshoot other issues, like thermostat problems. Your thermostat is responsible for turning your system on and off. If it isn’t working properly, it may stop signaling your AC to turn on when the indoor temperature rises.
Depending on the thermostat type, you may be able to reset the thermostat or replace its batteries. Then, see if your AC starts blowing cold air again. If it doesn’t, you may need to get your thermostat replaced.
Checklist for Troubleshooting Poor Cooling Performance
Before you call for professional help, there are a few steps you can take to troubleshoot the problem on your own.
Verify Thermostat Settings: First, check the thermostat settings. If the mode is incorrect or the temperature setpoint is too high, the AC won’t turn on to cool your home.
Replace or Inspect the Air Filter: A dirty or clogged filter can block airflow into your HVAC system. Ideally, the filter should be changed every 30 to 90 days, depending on usage and the HVAC system’s requirements.
Check the Circuit Breaker: If the breaker for the outdoor panel trips, the outdoor unit will stop working and warm air will blow from the vents. Try resetting the breaker once to fix the issue. If it immediately trips again, there’s an underlying problem that must be addressed by a professional.
Make Sure All Vents and Return Registers Are Open: Blocked vents can restrict airflow and lead to uneven temperatures in your home. Open your vents and registers. Then, make sure furniture and other items aren’t obstructing the airflow.
Inspect the Outdoor Condenser for Dirt or Debris: Check the outdoor unit for debris. After shutting off the unit at the breaker or disconnect box, you can clean it using a gentle stream of water from your hose.
Look for Ice on Refrigerant Lines or Coils: Iced-up lines and coils can happen if the refrigerant levels are low or the evaporator coil is dirty. If there is ice present, you’ll need to schedule professional HVAC services.
Listen for Unusual Sounds: Odd noises can indicate the source of the problem, so note any unusual sounds to tell the HVAC technician.
What Not To Do
While homeowners can perform basic maintenance and troubleshooting on their own, the following tasks should be left to the professionals.
Don’t Add Refrigerant Yourself: Refrigerant is hazardous to your health and the environment, so only an EPA-certified technician should add refrigerant to a stationary air-conditioning system.
Don’t Open Electrical Panels or Attempt Any Electrical Repairs: Malfunctioning electrical systems can lead to electric shocks, fires, and damage to your home if they aren’t fixed correctly.
Don’t Run an AC That Has Frozen Coils: Continuing to run an AC with frozen coils can worsen the ice buildup. The added strain can lead to a burned-out blower motor and compressor failure.
Don’t Ignore Burning Odors or Unusual Noises: Burning odors can occur because of electrical problems, which can lead to a fire and melted components. Certain noises, such as loud screeching sounds and grinding sounds, can indicate serious motor, bearing, compressor, or other mechanical problems. As soon as you notice burning smells or odd noises, immediately shut off the unit and reach out for professional help.
Why Your AC Runs but Doesn’t Cool
Often, homeowners confuse airflow in their home with cooling. Your blower motor and fan can still circulate air when the outdoor condenser unit is off or not working right. For example, a faulty capacitor or a malfunctioning compressor can lead to a decline in cooling performance. Similarly, low refrigerant levels can lead to warm air blowing through your home despite the fan operating normally.
Smart Thermostat Issues To Watch Out For
Sometimes, cooling issues are the result of thermostat-related issues. The following are some common reasons why a smart thermostat might negatively impact your home’s cooling performance.
Incorrect Schedule: When your schedule is set incorrectly, your home may not cool at the time you want it to.
Eco Mode: Depending on the thermostat, eco mode may use an energy-saving setpoint or range and may reduce cooling when the home is unoccupied. However, both of these features mean your home may be warmer than expected. If eco mode is making your home uncomfortable, you may need to adjust your temperature range so the highest side of the range is lower.
Wi-Fi Connection Issues: When your smart thermostat won’t connect to Wi-Fi, it won’t receive temperature adjustments from your mobile device.
Low Batteries: Some thermostats use batteries instead of being hardwired into your home’s electrical system. If the batteries are low, the thermostat may not be able to trigger your AC to turn on.
Sensor Calibration Problems: Dirty, poorly calibrated, or poorly located sensors may produce an inaccurate temperature reading. As a result, your AC won’t be signaled to turn on. Sensor problems can also occur if the sensor is placed in direct sunlight, near your oven, or in a drafty location. These types of placements can cause it to read a temperature that is significantly different from the rest of the room.
Can Heat Pumps Have Cooling Issues?
Heat pumps rely on the same refrigerant-based technology as air conditioners, so they can absolutely encounter cooling problems. For the most part, heat pumps are susceptible to the same issues as air conditioners. If your heat pump isn’t blowing cold air, one of the following issues may be at fault.
Reversing Valve Issues: Because they rely on reversing valves to switch the direction of refrigerant flow between the heating and cooling seasons, you may also encounter problems with your reversing valve. If the valve is stuck in heating mode, you’ll notice warm air coming from your indoor vents.
Refrigerant Leaks: Like ACs, heat pumps can develop refrigerant leaks that can harm cooling performance.
Defrost Cycle Confusion: During the defrost cycle, the heat pump temporarily reverses the refrigerant flow during extremely cold weather to heat and defrost the outdoor coils. During defrost, the air from the indoor vents may temporarily feel cooler. As long as the cycles aren’t excessively frequent or extended, the defrost cycle is likely a normal part of your unit’s operation in cold weather.
Compressor Problems: If a compressor becomes strained by low refrigerant, increased workloads, age, or other issues, it can break down. This can result in poor cooling output, breakers that trip frequently, grinding or screeching sounds, and short cycling.
Any issues with your refrigerant, reversing valve, or compressor should be dealt with by a trained professional. Additionally, you should always call for help if your heat pump stops working during periods of extreme cold or heat.
Common AC Sounds and What They Mean
By noting which sounds occur, you can figure out what is going on with your air conditioning system.
Sound
Meaning
Hissing
This often happens due to a refrigerant leak.
Buzzing
You may notice a buzzing sound if there is a problem with the capacitor or electrical wiring.
Grinding
This may occur due to a motor or bearing issue.
Clicking
Often, clicking sounds happen when there is a problem with the thermostat or relay.
Rattling
Rattling sounds can occur if there are loose components or debris in your unit.
Preventive AC Maintenance Tips
Once you’ve successfully fixed your AC, it’s important to prevent the same cooling problem from happening again. The last thing you want is to require an emergency air conditioner repair on a sweltering hot day. With the following tips, you can keep your air conditioner blowing cool air.
Seal Air Leaks
To get the most out of your AC, you need to seal any leaks in your ductwork. You should also inspect your home for potential leaks. Windows and doors are common spots where cold air can escape. When this happens, your AC has to work extra hard to keep the air cold.
Insulate Properly
You can reduce your electricity bill by improving the insulation in your home. Good insulation prevents cold air from leaving. Other than reducing your power bill, insulation can prevent repairs because your air conditioner won’t have to work as hard to keep your home cold.
Get Routine Maintenance
Your air conditioner is supposed to get routine maintenance at least once a year. Ideally, this should happen before the summer. During this visit, an HVAC technician will inspect your AC for wear and tear. They’ll clean the AC’s parts, diagnose issues, and recharge the refrigerant. With proper maintenance, you can prevent future breakdowns.
Change Your Air Filter
If your air conditioner’s not blowing cold air but is running, it may be time to change your air filter and perform routine maintenance. Your air filter should be changed every one to three months to protect your AC.
Clean Evaporator and Condenser Coils
You can protect your AC from wear by cleaning the evaporator and condenser coils. The condenser coils can be cleaned with a hose after the AC has been switched off. Be careful not to bend the delicate fins. While your outdoor coils can be cleaned on your own, the indoor coils should be left to the professionals.
Set a Thermostat Schedule
If you don’t have a smart thermostat, it may be time to invest in one. By creating a schedule for your smart thermostat, you can save energy and reduce the amount of wear on your AC.
Perform Seasonal Checks
To keep your AC functioning at its best, make sure to clean and test your cooling system in the spring before it is used all the time. In the summer, you should monitor its performance and continue completing your routine maintenance tasks. When winter rolls around, prepare your HVAC system for your wintertime heating requirements. As winter begins, make sure your AC’s outdoor unit is protected from the elements.
Homeowner Checklist for Seasonal HVAC Maintenance
Change the air filter every one to three months.
Clean the condenser coils.
Remove debris from around your outdoor unit.
Clean the vents.
Monitor energy bills for signs of sudden jumps in energy consumption.
Schedule HVAC tune-ups for spring and fall.
When To Call a Professional Immediately
Because of the risks involved, you should immediately call for help if you notice any of the following symptoms.
A suspected refrigerant leak
Burning smells
Recurring ice buildup
A compressor that won’t start
Repeated breaker trips
Loud grinding or buzzing noises
Cooling problems that remain after basic troubleshooting
Central Oregon Heating, Cooling, Plumbing & Electrical has served Central Oregon homeowners since 1993 and holds a 4.9-star rating from more than 6,800 customer reviews. Our experienced HVAC technicians can safely diagnose and repair refrigerant leaks, compressor issues, wiring problems, and other complex AC issues.
FAQs
Why is my AC running but not cooling the house?
If you have an AC that is not blowing cold air, a few issues may be going on. You could have a dirty filter, frozen evaporator coils, a faulty thermostat, low refrigerant levels, or blocked condenser coils. You can troubleshoot by resetting your thermostat, changing the air filter, and cleaning the condenser coils. However, if this problem keeps recurring, you should get professional help.
How often should I replace filters?
Ideally, air filters should be replaced every one to three months. You should check with your manufacturer’s directions to see if they have any specifications. Additionally, you should change the filter more frequently if you have a particularly dusty home or are using your AC more frequently.
Can I add refrigerant myself?
No, you can’t. The United States has specific laws about who can handle refrigerants. HVAC technicians are required to be federally certified, so this isn’t something that can be done by a homeowner.
Why does my AC freeze up?
Anything that decreases the airflow or reduces refrigerant levels can cause your AC to freeze. Before troubleshooting, you should let the evaporator coils thaw completely. Then, change your air filter and make sure all of the vents are open. If your AC continues to freeze, you may have a faulty blower motor, dirty evaporator coils, or a similar problem that requires professional AC repair services.
Why is my AC blowing warm air only in one room?
If you have an AC that is not cooling but blowing warm air in one room, it may be related to ductwork issues or closed vents. However, it could also be related to how your system is set up. If the thermostat sensors are in an especially cold area or the room is the farthest from the AC, it may not be getting as cold as the rest of the system. A complete HVAC inspection can help you figure out what’s going on.
How much does AC repair cost on average?
The cost of AC repairs in Oregon depends on the type of issue, the required repair, and the parts involved. While repair costs can vary widely, different components have their own repair or replacement expenses. For example, replacing a circuit board may involve a lower repair cost, while compressor replacement is typically one of the more expensive AC repairs due to the complexity of the component and labor involved. Contact our certified HVAC professionals in Bend to get honest, upfront pricing.
What’s cheaper long term: repair or replace?
It depends on the type of problems you’re experiencing and the age of your system. If repair costs are less than half the cost of a replacement or the AC is less than 10 years old, it likely makes more sense to simply repair it.
Why does my AC leak water inside?
If your AC is leaking water on the inside, a few things could be going on. There are three essential reasons why this may happen. If low refrigerant levels or a dirty filter cause your evaporator coils to freeze, you may notice water leaking. Clogged condensate drain lines and damaged drain pans can also lead to leaking water.
Can poor insulation cause my AC to seem weak?
Poor home insulation forces your AC to work harder to reach and maintain the same temperature. While it doesn’t actually weaken your AC, it can eventually lead to increased wear and tear. To avoid more frequent repairs and high energy bills, it’s a good idea to improve your home’s insulation.
How do I know my AC is the wrong size for my home?
There are a few signs your AC’s capacity may be too high or too low.
Short cycling or unusually long cycles
High humidity
Inexplicably high energy bills
Uneven cooling
Performance issues
Should I turn my AC off if it isn’t blowing cold air?
Yes, you should turn off your AC to prevent damage to your compressor if you see ice, smell burning, hear serious mechanical noises, or suspect a malfunction. Otherwise, first check the thermostat, filter, vents, and breaker.
If this issue occurred because of a frozen evaporator coil, you’ll need to wait for your coil to thaw before running the AC again. Additionally, you can troubleshoot by seeing if the breaker has tripped. For repeatedly tripped breakers and recurring frozen coils, you should reach out for professional diagnostics.
Why is my AC cold at night but warm during the day?
This can occur if the daytime heat gain is more than your AC can keep up with. Often, this happens because of an undersized AC unit, a failing capacitor, low refrigerant, restricted airflow, or dirty condenser coils.
Can dirty condenser coils stop my AC from cooling?
The condenser coils are normally responsible for releasing heat into the outdoor air. Excessive dirt buildup acts like insulation and prevents heat from leaving your system. This can cause your unit to overheat and shut down, which will immediately impact your cooling performance.
Why is only one room not getting cold air?
Often, this occurs if there is a ductwork issue, a closed vent, or an unbalanced HVAC system. One room can be unusually warm if it has poor insulation, southern- or western-facing windows, or other issues causing heat gain.
How long should it take for an AC to cool a house?
It depends on the home’s starting temperature. You should feel cold air coming from your vents within minutes, but it will take much longer to cool your home on hot days. In general, ACs can lower the indoor temperature by 2 to 3 degrees per hour.
Why does my AC keep running without reaching the thermostat setting?
This can occur if your AC is unable to absorb and release enough heat from your home. Clogged air filters, low refrigerant, leaky ducts, and dirty coils are just a few of the issues that could be responsible.
Can a power outage affect my AC’s cooling performance?
Absolutely. Power surges when the electricity turns on again can damage your capacitor and cause increased strain on your compressor. In addition, power outages can reset some of your thermostat settings and trip the breaker on your outdoor unit.
What should I check before calling for AC repair?
Before calling for AC repair, check for incorrect thermostat settings, dirty air filters, and tripped breakers. Then, verify that the vents and returns are open and unobstructed. Note any ice on your evaporator coil or unusual sounds because these can help with the diagnostic process. If basic troubleshooting doesn’t help, you should reach out for professional repairs.
Schedule HVAC Diagnostics Today
As a homeowner, you can troubleshoot by completing the basic checklist. If these steps don’t work, you’ll need to schedule professional repairs to prevent damage to your unit. Timely maintenance and repairs can quickly restore your home’s cooling performance and help you avoid more extensive repairs in the future.
Contact Central Oregon Heating, Cooling, Plumbing, & Electrical to schedule AC repair service and keep your family cool this summer.
How to Optimize Your AC Performance during the Hottest Summer Months
From the moment you turn your air conditioner on, it should provide reliable, efficient performance throughout the summer. The AC is designed to provide balanced cooling in each room of the house to keep your family safe and comfortable, regardless of Oregon’s climate.
To maintain the desired indoor temperature, consider these three steps:
Invest in the right equipment.
Maintain the equipment according to manufacturer specifications.
Address problems as they arise without delay.
Following these steps ensures your system performs optimally at minimal cost.
Below, we outline a thorough AC guide for summer in Central Oregon. First, we’ll look at Oregon’s unique summer climate to lay the groundwork for the type of system you should purchase for your home.
Next, we provide consumer tips for choosing the right cooling equipment. We’ll also give you some pointers on caring for your system and addressing AC repairs as they happen.
Finally, we’ll help you figure out what to look for in an HVAC company in Central Oregon. At Central Oregon Cooling, we can install and service your system. Our team of HVAC Professionals can walk you through the best AC features and what to look for in a new system.
Quick Summary
Optimizing AC Performance: Ensure reliable and efficient cooling in Oregon’s climate by investing in suitable equipment, maintaining it properly, and promptly addressing issues.
Understanding Oregon’s Climate: Central Oregon’s warm, dry summers with moderate winds require AC systems tailored to its higher altitude, dry air, limited precipitation, and sunny conditions.
Choosing the Right AC: Consider factors like SEER ratings, heat pump functionality, square footage, floor plan, and efficiency levels to select the most suitable AC for your Central Oregon home.
Discover Central Oregon’s Unique Climate
In Central Oregon, the weather is usually warm and sunny with clear blue skies. Temperatures can get hot during the day, often reaching into the mid-80s. At night, it can drop into the 40s or 50s.
Central Oregon is in a high desert area. So, it doesn’t retain heat once the sun goes down. Compared to other regions of the US, summers in Central Oregon are relatively mild, making it a great environment for outdoor activities like hiking, camping, and swimming.
Higher Altitude
The region sits at a higher elevation compared to coastal areas. At around 3,000 to 4,000 feet above sea level, Central Oregon experiences cooler temperatures. During the summer, warm temperatures drop significantly at night.
Dry Air
The Central Oregon climate has dry air during the summer months. With low humidity levels, the air feels crisp and dry, which is different from coastal areas where humidity is higher.
Limited Precipitation
Central Oregon receives 11.36 inches of precipitation annually. However, this is mostly due to snow in the winter. During summer, Central Oregon experiences limited precipitation compared to other times of the year. Rainfall is rare. So, there are mostly dry conditions throughout the season.
A Sunny Summer
Central Oregon has many cities that exceed 300 days of sunshine per year, including towns such as Bend, Klamath Falls, and Redmond. The sun’s rays fuel the region’s warm daytime temperatures.
Moderate Winds
Central Oregon experiences occasional windy conditions, particularly in certain areas like the high desert plains and mountain passes. During summer, the winds provide relief from the heat and keep temperatures comfortable.
What Should I Consider When Buying an AC?
Let’s look at what you need to consider when buying an air conditioner for this area. Keep in mind that not all air conditioners are alike. Some systems work better in climate than others. Here is an AC buying checklist to help you compare AC brands and models:
1. The SEER Energy Rating
What does SEER mean? It’s an acronym for Seasonal Energy Efficiency Ratio.
According to the Department of Energy, the SEER Rating measures how efficient your air conditioner is throughout the entire summer. Agencies like the Energy Information Administration (EIA) and ENERGY STAR calculate the rating by dividing your air conditioner’s total cooling output (in BTUs — keep reading below) by the total watts hours the AC uses during the season.
If we were to write it in an equation, here’s how it would look:
SEER = Total Output of Cool Air (in BTUs) / Total Electric Energy Input (in watt-hours)
What is the best SEER rating for AC? When buying a cooling system, your goal should be to get a unit with the highest SEER rating possible. Why? Because if the SEER rating is high, your AC will be more efficient. Depending on the year the unit was manufactured and the type of AC, Oregon’s recommendation for a minimum SEER rating is 14 to 15 for heat pumps and central air conditioners.
Note: Oregon regulations allow for a minimum SEER rating of 14 (as per SEER2 rating), but this can vary based on the manufacturing date and AC type.
2. Heat Pumps
When choosing the right cooling system, you want equipment that works best for Central Oregon. Since the summers are relatively mild with little temperature fluctuations, it’s a good idea to consider a heat pump vs air conditioning.
A heat pump transfers heat from one location to another using refrigerant cycles. It cools and heats by extracting heat from the air or ground outside and transferring it indoors during colder months. In the warmer months, it transfers heat in the opposite direction.
During the summer, a heat pump works like an air conditioner by absorbing heat from inside your home and channeling it outside. It does this by circulating refrigerant through coils to absorb heat indoors. It then releases it outdoors, resulting in cooler air inside your home.
Is a heat pump more expensive than an AC? While a heat pump normally has higher installation costs, it is often cheaper to run than an AC. Since a heat pump provides both cool and warm air, you don’t have to buy a separate unit for the winter.
One drawback of buying a heat pump is that older models may not be as efficient in extremely cold climates, as they rely on extracting heat from outdoor air. Newer models have better technology and are quite effective in cold climates. If you choose to install a heat pump, you may be required to replace the whole HVAC if you switch to a variable-capacity unit.
Our HVAC company in Central Oregon can help you determine which system is best for your home. To learn more, call one of our HVAC professionals for a free consultation about your home’s cooling needs.
3. The Total Square Footage of Your Home
How big does my AC unit need to be? The more square footage your home has, the more space you need to cool. Therefore, you’ll need a more powerful system. To measure how much power you need, you can use British Thermal Units (BTUs).
BTUs measure how much power a unit requires to remove heat from the air, so there is a direct relationship between BTUs and room size. The bigger the livable area is in your home, the more BTUs the system needs. This is especially true as the summer gets hotter in Central Oregon and temperatures climb into the 80s and 90s.
How many AC BTUs per square foot does your home require? For a general idea, look at the table below:
Home Square Footage
Required AC BTUs
100 – 150 sq. ft.
2,000 – 3,000
300 – 350 sq. ft.
6,000 – 7,000
700 – 1,000 sq. ft.
14,000 – 20,000
1,000 – 1,200 sq. ft.
20,000 – 24,000
1,400 – 1,500 sq. ft.
28,000 – 30,000
2,000 – 2,500 sq. ft.
40,000 – 50,000
4. Your Home’s Overall Floor Plan
How your home is designed can impact your air conditioner’s performance. Before buying a new unit, think about these factors:
The number of stories in your home
Whether you will cool the basement
The type of floor plan in your home
The number of actual livable or inhabited rooms
The type of home construction material
After answering these questions, you will better understand the type of system to purchase and the power required. If you’re still uncertain, it’s a good idea to speak with a Central Oregon HVAC company or reach out to your local energy provider for additional guidance. At Central Oregon Cooling, you can get same-day service, maintenance plans, and new air conditioning installations for your home. We can help with all of your HVAC questions.
5. High-Efficiency Air Conditioners
Earlier we talked about the SEER rating and its importance. This is something you will need to consider because not all products have the same rating.
Since the year 2023, the EIA requires a minimal SEER rating of 14 for all air conditioners, regardless of the type of system. However, your goal should be to get an AC with the highest SEER rating possible for maximum efficiency.
Consider this chart below:
Category
SEER Rating
High-Efficiency
18+
Mid-Efficiency
15 – 17
Low-Efficiency
14 – 15
High-efficiency air conditioners are different from standard AC. They have a higher-than-average SEER rating. Look at these characteristics of a high-efficiency AC product:
A SEER rating above 18.
ENERGY STAR certification.
Enough BTUs for efficient operation.
Variable-capacity or variable-speed functionality.
If you put together all these characteristics, you can find a model that provides optimal performance at a lower cost.
6. Other Considerations
Here are other things that can help you refine your product comparison.
Smart features, like Wi-Fi connectivity and app control
Thermostat functionalities
Air quality enhancements
Noise and performance levels
Requirements for installing and maintaining the equipment
Warranty and cost
Consumer ratings and reviews
Personal preferences and lifestyle considerations
Three Types of Home Air Conditioners in Central Oregon
When looking for an air conditioner in Central Oregon, there are three primary types of air conditioner systems you can choose from:
Central Air Conditioner
Overview: What is a central air conditioning system? This type of system cools your home by drying and circulating air through a network of ducts. It consists of two main parts: the condenser and compressor on the outside, while the blower and coil are inside of your home.
Operation: The system uses a refrigerant to absorb indoor heat, which then evaporates to a gas that the compressor moves to the outdoor unit, releasing heat outside. The cooled refrigerant cycles back indoors and continues the process, while the blower distributes the chilled air.
Ideal use: If your home has pre-existing ductwork and multiple rooms need cooling, a central AC is effective. It’s also quiet and can be installed in smaller spaces.
Heat Pump
Overview: Unlike a central air conditioner, a heat pump cools and heats your home, utilizing the outside air or ground as a source.
Operation: In cooling mode, it removes the heat from your home and expels it outside, which cools and dehumidifies your indoor air.
Ideal use: It works best for moderate climates like Central Oregon. It’s cost-effective since you don’t need separate systems for heating and cooling. Consider this if you’re in an area with mild winters.
Ductless Mini-Split AC
Overview: What is a ductless mini-split AC?When comparing ductless vs central air, it’s important to remember that this type doesn’t require ductwork. It has an outdoor compressor/condenser and indoor air handling units.
Operation: The compressor cools the refrigerant and sends it to the units inside via a conduit, allowing individual room temperature control.
Ideal use: This option is great for houses that don’t have ductwork or for supplementing existing air conditioning, offering targeted cooling without extensive installation requirements.
Each system primarily functions to remove heat, making your home cooler. Let’s examine each type more closely to determine which suits your needs best in Central Oregon, especially during the hotter months of July and August.
Which AC Works Best for My Home Environment?
Below is a comprehensive chart that compares the three main Air Conditioners that homeowners use in Central Oregon:
System Type
Central Air
Heat Pump
Mini-Split AC
Primary Function
Cooling
Heating and Cooling
Heating and Cooling
Energy Efficiency
Moderate (varies by SEER rating)
High (especially in mild climates)
Very high (high SEER ratings)
Installation Requirements
High (needs ductwork)
Moderate to high (requires ductwork for traditional systems)
Low (no ductwork needed)
Maintenance Needs
Filter changes
Similar to central air, plus seasonal mode switching
Less frequent; no ducts, but regular filter cleaning needed
Space Requirements
Significant (indoor and outdoor units)
Similar to central air (space for indoor and outdoor units)
Inherent (each indoor unit controlled independently)
Lifespan
15-20 years
15-20 years (can vary with climate)
20+ years (depends on maintenance)
Climate Suitability
Best in hot summers
Efficient in moderate winters
Excellent for both hot and cold climates; ideal for targeted heating/cooling
Modern, Convenient AC Features for Your Home
Modern air conditioners are designed to save energy, which, in turn, lowers your cooling costs. Advanced features also enhance your lifestyle and make it easier to achieve optimal temperature control. Whether you’re building a new home or getting rid of your outdated system, check out these advanced AC features.
Programmable Thermostats
When you install a programmable thermostat, you can control the temperature of your home and schedule when the cooling system turns on and off. Instead of manually adjusting the thermostat every time you want to change the temperature, you can program it to automatically adjust at different times. If you’re at work or asleep, the thermostat changes the temperature to your specifications.
Smart Thermostat
With a smart thermostat, you have control of your AC from a connected device. It’s termed “smart” because it learns your behavior and preferences, changing the temperature without manual control for comfort and energy efficiency.
Smart thermostats also provide notifications and maintenance reminders, such as when to replace the air filter or if your HVAC system encounters issues. They offer a convenient and energy-saving method to regulate your home’s climate.
Zoned Temperature Control
Zoned temperature control segments your home into distinct areas or zones, each equipped with its own thermostat and temperature settings. This system allows individualized climate control in different parts of the house, enhancing comfort and efficiency.
Instead of having one thermostat controlling the temperature for the entire house, zoned control lets you adjust the temperature separately for each zone.
You can have different temperatures in different rooms, which can be more comfortable and energy-efficient, especially if some rooms are used more than others. Zoned temperature control helps you customize your home’s climate to fit your needs and preferences.
Built-In Indoor Air Quality
While the state of Oregon reports that all regions must meet federal air quality standards and the outdoor air is safe, the air inside your home might tell a different story. Built-in indoor air quality solutions are designed to enhance the air you breathe indoors.
These systems often feature air filters, UV lights, and humidity controls that collaborate to eliminate pollutants, allergens, and unnecessary moisture. This setup allows you to maintain a healthier and more comfortable indoor atmosphere, irrespective of external air conditions.
Ensuring Your AC Performs Reliably Throughout the Summer
The installation of a new air conditioner marks the beginning of a continual effort to maintain optimal function over the life of the system. Even the sturdiest and most reliable units will eventually require repairs. To ensure your AC operates efficiently year after year, regular tune-ups and summer air conditioning maintenance are essential.
At Central Oregon Cooling, we can help with all of your maintenance and AC repair needs. Through our maintenance plan, you can get your system inspected and maintained properly. We’ll track when your system needs to go through our summer tune-up checklist, so you don’t have to lift a finger.
By committing to professional AC maintenance in Central Oregon, you can save significant amounts of money on energy costs and avoid costly repairs down the line. Consider the following statistics:
According to the US Department of Energy, just changing the filters on your AC reduces energy consumption by 5% to 15%.
Maintaining your ductwork can improve the efficiency of cooling and heating systems by as much as 20%.
Even high-end maintenance costs generally do not exceed $500. In contrast, repairs can run as high as $4,200, and replacing your system might cost over $5,000.
Ultimately, investing in regular maintenance for your air conditioner is financially advantageous, saving you considerable money in the long run.
Quick Summary
Central Oregon Summer Climate: Warm, sunny days with significant temperature fluctuations characterize Central Oregon summers, emphasizing the need for efficient AC maintenance.
Key Maintenance Components: Professional AC maintenance involves thorough inspections, servicing, cleaning, and air filter maintenance to ensure optimal performance.
Benefits of Maintenance Plans: Maintenance plans offered by HVAC companies in Central Oregon provide cost savings, priority service, and scheduled visits, reducing overall cooling expenses and ensuring smooth operation.
The Effect of Central Oregon Summers on AC Maintenance
Summertime in Central Oregon typically brings warm, sunny days with clear skies, with daytime temperatures often reaching the mid-80s before cooling off significantly at night. As a high desert region, Central Oregon does not retain heat well after sunset.
Throughout the summer months, temperatures can vary from the 70s to the mid-80s, with an average of 59.4° from May through September. Here’s a month-by-month breakdown:
June
Average high: 72ºF
Average low: 44ºF
Average rain: 09”
July
Average high: 81ºF
Average low: 50ºF
Average rain: 0.4”
August
Average high: 81ºF
Average low: 50ºF
Average rainfall: 0/3”
Understanding Air Conditioner Maintenance and Its Components
What maintenance does an air conditioner need? The most effective way to get your AC working efficiently is through professional HVAC services in Central Oregon. Central Oregon Cooling can help you figure out the right AC maintenance schedule for your system. Then, we can schedule your annual maintenance and tune-up appointments.
During these sessions, a technician will conduct a seasonal tune-up and comprehensive evaluation of your air conditioning unit. The air conditioner preventive maintenance checklist typically includes four key activities:
AC Inspection: The technician will inspect all internal and external components of your system, test its functionality and identify any performance issues.
AC Servicing: Minor adjustments and repairs are made during this step to address small problems before they escalate into larger ones.
AC Cleaning: This involves removing dirt and buildup from the unit, which helps reduce friction in moving parts and ensures unobstructed airflow and condensation drainage.
Air Filter Maintenance: The technician will clean or replace your air filter based on the type you use. It’s important to replace the filter as recommended by the manufacturer.
It’s important to note that each HVAC service provider in Central Oregon might offer varying maintenance services, sometimes as part of comprehensive maintenance plans that include additional services and benefits. At Central Oregon Cooling, we offer a maintenance plan that helps our clients save money on repairs and AC replacement.
Below are typical tasks included in our AC maintenance program:
AC Maintenance Task
Task Description
Filter Replacement
Replace or clean air filters to maintain efficient airflow and enhance air quality.
Coil Cleaning
Remove dirt from evaporator and condenser coils to maintain cooling efficiency.
Coil Fin Straightening
Straighten any bent coil fins to improve airflow and enhance system efficiency.
Drain Cleaning
Clean the condensate drain to avoid water damage and manage humidity.
Refrigerant Check
Verify and adjust refrigerant levels as needed for optimal cooling performance.
Thermostat Calibration
Adjust the thermostat for precise temperature settings and energy savings.
Electrical Connections Check
Examine and secure electrical connections for safety and system reliability.
Lubrication of Moving Parts
Apply lubricant to motors and bearings to minimize friction and prevent wear.
Blower Components Adjustment
Modify blower components for correct airflow and balanced system performance.
System Controls Check
Evaluate system controls to ensure they properly initiate, operate, and shut down.
Ductwork Inspection
Check ducts for leaks, blockages, and insulation effectiveness to optimize air distribution.
Condensate Pump Inspection
Ensure the condensate pump operates efficiently and correctly.
Airflow Measurement
Measure airflow at the evaporator coil to confirm it aligns with design specifications.
Safety Devices Check
Test safety mechanisms to confirm they are operational and protecting the system.
Air Leakage Check
Investigate potential air leaks in the AC unit and ductwork to prevent energy waste.
Performance Evaluation
Perform a thorough assessment of the system to verify efficient and effective operation.
What Are the Benefits of an AC Maintenance Plan?
Cooling your home during the summers in Central Oregon can be expensive, with significant expenditures on AC repairs and energy bills. Many of these expenses are due to the neglect of regular system maintenance. That’s why learning how to maintain an air conditioner is crucial.
However, the cost of maintenance itself can stretch your budget. To help manage these costs, our HVAC company in Central Oregon offers AC maintenance plans in Bend and Redmond that can save you money on maintenance, repairs, and energy expenses.
We’ve designed our plan to offer all of the tune-ups, discounts, and visits our customers need to keep their Air Conditioners working as smoothly as possible. Here’s what our maintenance plans include:
Service Discounts: Reduced rates for certain services.
Exclusive Specials: Access to offers not available to the general public.
Priority Service: Guarantee of immediate attention even during peak times.
Scheduled Visits: Automatic arrangement of annual or seasonal maintenance.
Timely Notifications: Alerts for upcoming service appointments.
Note: Investing in an AC maintenance plan reduces your cooling expenses, ensures your air conditioner operates smoothly, and provides benefits not typically available with standard service. If you are interested in learning more about how an AC maintenance plan can help your AC system, reach out to Central Oregon Cooling today.
Tips for Caring for Your AC This Summer
While most AC maintenance and repairs are best handled by professionals, there are several simple steps you can take to help maintain your air conditioner this summer. These tasks require minimal effort and only a basic understanding of air conditioning systems.
1. Consult Your Owner’s Manual
Your owner’s manual is a valuable resource for understanding your Air Conditioning unit. It covers everything you might need to know, including:
How to operate the unit
Maintenance recommendations
Troubleshooting advice
Safety guidelines
Warranty details
Technical specifications
If you don’t have a physical copy of the manual, you can usually find a downloadable PDF version on the manufacturer’s website tailored to your specific model.
2. Change or Clean the AC Air Filter
Remember that not every air filter is meant to be thrown away. If your AC has a washable filter, clean it as specified in the manufacturer’s instructions.
For disposable filters, consult your AC owner’s manual to find out the recommended frequency for replacements. Alternatively, you can use the following chart as a general guideline for when to change your home’s air filter:
Filter Type
Change Frequency
Fiberglass Disposable Filters
Every 30-60 days
Pleated Media Filters
Every 90 days
Electrostatic Filters
Every 30 days
HEPA Filters
Annually or as recommended
UV Filters
Check the manufacturer’s guidance
Activated Carbon Filters
Every 3 months
3. Maintain Cleanliness Around the External AC Unit
Keep the area around your outdoor AC unit free from leaves, dirt, grass, and debris to ensure proper airflow and efficient operation. Use a rake or broom to clear any debris and trim any bushes or plants that grow too close to the unit. A clean surrounding helps the AC unit operate more effectively and last longer.
4. Inspect the Condensate Drain Line
Air conditioners produce condensation during operation. There is typically a drain pan under the coil to collect water, which can become clogged with dirt over time. Check if the drain pan is full and clear the line if needed to allow water to drain properly.
5. Ensure Proper Airflow Through Vents
To check for adequate airflow, turn on the AC and hold your hand over a vent for at least 30 seconds. You should feel consistent airflow and cool air. If the airflow is uneven, there might be blockages or leaks in the ductwork.
6. Check the Thermostat
It is important to make sure your thermostat is working properly. Verify that all features work correctly, especially if you have a programmable or smart thermostat, and check for any issues like short cycling, which may indicate a thermostat problem.
7. Winterize the Outdoor AC Unit
With the harsh winters in Central Oregon, it’s crucial to protect your outdoor AC unit. Clean the area around it and cover the unit with a heavy-duty, weatherproof tarp. Alternatively, consider a ventilated hardcover. Ensure proper drainage around the unit to avoid water accumulation.
8. Address AC Issues Promptly
Never ignore AC problems as they can escalate quickly. Addressing issues immediately can prevent a minor repair from turning into a costly one. You can contact our local HVAC service provider in Central Oregon to inspect and repair any problems as soon as they arise.
9. Insulate Your Home
Proper insulation keeps cool air inside during summer. Ensure your walls, attic, and crawl space are well insulated. Check windows and doors for drafts or air leaks, which are common places for energy loss.
10. Keep All Doors and Vents Open
It may seem intuitive to close off unused rooms, but this can actually strain your Air Conditioning system. Your HVAC is designed to distribute air evenly across all rooms. Keeping all doors and vents open ensures optimal airflow and prevents undue stress on your AC system, prolonging its life and enhancing performance
Quick Summary
Common AC Problems: AC issues like refrigerant leaks, frozen evaporator coils, and faulty thermostats can disrupt cooling and are often caused by wear and tear, low airflow, or electrical faults. Recognizing these signs early can prevent larger repairs.
Key Troubleshooting Steps: If your AC system stops working, turn it off to avoid further damage, keep windows and doors closed to maintain cool air, and contact a certified HVAC technician in Central Oregon for professional assistance.
Potential Hazards to Watch For: Pay attention to unpleasant smells, such as burning rubber, rotten eggs, or natural gas, as they may indicate serious AC issues or safety hazards requiring immediate attention from an HVAC professional.
Troubleshooting Common AC Problems
While it’s best to have a certified HVAC contractor in Central Oregon handle AC repair near you, being able to recognize signs your AC needs repair can prevent bigger problems later. Here’s a guide to some typical AC troubleshooting, how to spot them, and the steps you should take when they occur.
Identifying and Addressing Common AC Issues
1. Refrigerant Leaks
Issue: Refrigerant escaping due to system leaks.
Cause: Corrosion, poor connections, or defects in manufacturing.
Signs: Reduced cooling efficiency, hissing sounds, and ice on refrigerant lines.
2. Frozen Evaporator Coils
Issue: Frost or ice accumulation on the coils.
Cause: Low airflow, insufficient refrigerant, or faulty components.
Signs: Warm air from vents, diminished airflow, and water leaks.
3. Dirty or Clogged Air Filters
Issue: Build-up of dust and debris in air filters.
Cause: Neglected maintenance or high indoor pollutant levels.
Signs: Lower airflow, decreased cooling, and higher energy costs.
4. Faulty Thermostat
Issue: Incorrect temperature readings or HVAC control failure.
Cause: Electrical problems, issues with calibration, or aging.
Signs: Inconsistent room temperatures and HVAC not activating properly.
5. Electrical Issues
Issue: Faults in the electrical connections, wiring, or components.
Cause: Normal wear and tear, substandard installation, or power fluctuations.
Signs: Circuit breaker trips, flickering lights, and burning smells.
6. Capacitor Problems
Issue: Start or run capacitor malfunction.
Cause: Aging, electrical faults, or overheating.
Signs: AC not starting, humming sounds, and frequent on/off cycling.
Cause: Overheating, refrigerant problems, or mechanical wear.
Signs: Hot air from vents, loud operational noises, and tripping breakers.
8. Fan Motor Issues
Issue: Failure of the blower or condenser fan motor.
Cause: Insufficient lubrication, electrical troubles, or wear and tear.
Signs: Reduced airflow, strange noises, and system overheating.
9. Drainage Problems
Issue: Condensate drain line blockage or damage.
Cause: Debris build-up, algae, or poor installation.
Signs: Water leaks, mold or mildew presence, and musty smells.
10. Improper Sizing or Installation
Issue: HVAC system mismatched to home size or ductwork.
Cause: Inaccurate assessment, installation shortcuts, or DIY installation mistakes.
Signs: Ineffective cooling/heating, frequent system cycling, and uneven temperatures.Recognizing these problems early can help you address them before they escalate, saving time and money on repairs.
What to Do If Your AC Stops Working
When your air conditioner stops functioning properly, it’s important to act swiftly to prevent further issues. Follow this simple guide to handle a non-working AC efficiently.
Step 1: Turn Off the System
If you notice loud noises, unpleasant smells, or a lack of cool air, turn off the AC. Continuing to operate a malfunctioning system can cause additional damage. Simply switch the thermostat to the off position. Avoid unplugging the AC or switching off the fuse box.
Step 2: Keep Windows and Doors Closed
Especially during the summer, keep your doors and windows shut to maintain the cool air inside and keep warm air out. Additionally, avoid using heat-generating appliances such as stoves, hair dryers, and clothes dryers. Turn off any unnecessary lights as well.
Step 3: Contact a Local HVAC Professional
Rather than attempting DIY repairs, reach out to one of our certified HVAC technicians in Central Oregon. There are numerous advantages to using professional services from Central Oregon Cooling. While waiting for the technician, clear any clutter around the AC unit to facilitate a quicker repair process.Harmful smells may include:
Rotten eggs or sulfur
Natural gas
Chemicals
Musty odors
Burning rubber
Burning smell
Licensing and Certification for HVAC Technicians in Oregon
While you don’t need to be a certified HVAC technician to recognize the difference between a skilled professional and a novice, understanding licensing and certification requirements is crucial to safeguard your investment and avert potential issues.
Below is a brief overview of the necessary licenses and certifications for anyone providing HVAC services in Oregon.
License for Contractors
In Oregon, HVAC technicians must hold a formal license to service HVAC equipment. This license is issued by the Oregon Construction Contractors Board (CCB), which also regulates HVAC work in the state.
Certification Details
The Oregon Construction Contractors Board (CCB) provides various endorsements under each category of certification for HVAC professionals. After successfully obtaining certification, Oregon recognizes three types of licenses for HVAC technicians and contractors: Class A and Class B Limited Energy Technician licenses, and the Limited Maintenance Specialty Contractor HVAC-R license.
Quick Summary
Qualities of a reputable HVAC company include proper licensing, prompt service, fair pricing, quality work, clear communication, and positive customer references.
When selecting an HVAC contractor, verify their credentials promptly, check their visibility both offline and online, and ensure they offer 24/7 emergency services.
Hiring a certified HVAC technician in Central Oregon prevents further issues, protects warranties and insurance, and ensures reliable, lasting results compared to DIY approaches.
Finding a Reputable HVAC Professional in Central Oregon
In order to find the right HVAC professional in Central Oregon, you need to know how to identify a reputable contractor. Here are the essential qualities to look for in an HVAC company:
Holds proper licensing, certification, and insurance
Offers prompt and efficient service
Provides fair pricing
Delivers high-quality work on the first attempt with lasting results
Maintains punctuality, friendliness, and respect for your property
Communicates clearly and transparently about all aspects of the job
Avoids unnecessary upselling
Can produce references from recently satisfied customers
No HVAC company is flawless, but a reputable one will meet most, if not all, of these criteria. Experienced contractors value the importance of quality work and excellent customer service, making it possible to find a dependable technician in Central Oregon with some research.
At Central Oregon Cooling, we strive to leave each client completely satisfied. Our team is committed to delivering high-quality work that lasts. When you work with our HVAC technicians, you can enjoy receiving clear communication, punctual services, and fair pricing.
Here’s a checklist of what you can look for when shopping for a Central Oregon HVAC company:
1. Verifies Credentials Promptly
While many homeowners may not initially request credentials, a reputable technician should readily present their certification or licensing documents when asked.
If a technician hesitates or refuses to show their credentials, it’s wise to seek another provider, as hiring someone unqualified could jeopardize your AC system. At our HVAC company, our technicians are happy to show you their credentials and expertise.
2. Visible Both Offline and Online
A well-established company often enjoys high visibility in the Central Oregon community, with its name appearing on billboards, TV and radio ads, brochures, and even park benches.
Their online presence should be equally robust, featuring a user-friendly website and active social media pages enriched with customer reviews and ratings. When you work with our HVAC company, you can easily see all of our presence online and in our local community.
3. Provides 24/7 Emergency Services
A reliable HVAC company in Oregon will have sufficient staffing to offer prompt emergency services. This is crucial for immediate assistance outside of regular business hours, including nights, weekends, and holidays.
With Central Oregon Cooling’s membership plan, you can even get priority access to emergency services. We’re ready 24/7 because we know emergencies don’t happen on a 9-to-5 schedule.
4. Maintains a Professional Image
A professional appearance is key; reputable companies will have marked vehicles and uniformed technicians.
Opt for a company that exemplifies top-tier customer service and demonstrates professionalism at all levels, reflecting its commitment to excellence in every interaction. At our HVAC company, we are committed to providing the best level of customer service and professionalism.
5. High Customer Ratings and Reviews
In the digital age, customer feedback is invaluable and easily accessible through reviews on the company’s website, Google, or other social platforms.
This feedback provides a transparent view of the company’s service quality and customer care, minus the promotional gloss. When you go to Central Oregon Cooling’s website, Google Reviews, and social media pages, you can easily see our strong track record of satisfied customers.
6. Clear Communication
A straightforward technician will clearly explain the problem, the proposed solution, and the associated costs. If a technician is evasive or unclear about these critical details, it’s advisable to look elsewhere.
Effective communication is essential to ensure you are well informed and confident in your decisions regarding HVAC services. That’s why technicians at Central Oregon Cooling will always clearly communicate the problem, estimated repair costs, and what we can do to fix the issue.
Why It’s Wise to Hire a Certified Oregon Technician for AC Service
Many homeowners are tempted to handle HVAC maintenance or repairs themselves to save money. However, the initial savings often lead to frustration and additional complications. Here’s why you should consider hiring a professional HVAC technician in Central Oregon instead:
Experience and Expertise Matter
Experienced technicians, who work with HVAC systems daily, can identify and solve problems from multiple perspectives. Their deep understanding helps prevent future issues and ensures that every task is approached with expert knowledge, something that an inexperienced homeowner simply cannot match.
Prevent Further Issues with Certification
Certified technicians are trained to avoid common pitfalls, such as code violations, disputes, and warranty issues, that could potentially lead to significant legal and financial problems. The risk of encountering such problems far outweighs the small savings from DIY approaches.
Protect Your Warranties and Insurance
Many homeowners are unaware that DIY repairs can void warranties provided by AC manufacturers and home builders, which typically require professional servicing. Additionally, insurance claims might be denied if it’s discovered that unauthorized work led to any damage.
Achieve Reliable, Lasting Results
Professional HVAC technicians possess the necessary training, skills, and tools to effectively address a wide range of issues across various brands and models, ensuring that repairs are thorough and durable. DIY fixes might seem sufficient in the short term but can lead to recurring problems.
In summary, while the allure of saving money through DIY HVAC work is tempting, the potential downsides make it risky. Hiring a certified technician not only ensures that your system functions efficiently but also safeguards against future complications.
If you’re searching for HVAC maintenance, repair, and installation services in Central Oregon, you’ve come to the right place. Our HVAC company offers same-day services and high-quality results for local homeowners. To learn more, reach out to one of Central Oregon Cooling’s HVAC professionals today.
Even a small drip of water can add up significantly. Dripping faucets are due to a worn internal component, such as a washer, O-ring, cartridge, or valve seat. By understanding common causes and solutions, you can determine when a DIY repair will work and when you should reach out to Central Oregon Heating, Cooling, Plumbing & Electrical for professional help.
Key Takeaways
If the faucet is leaking when off, you’re likely dealing with a worn washer, faulty cartridge, damaged O-ring, loose parts, corroded valve seat, or high water pressure.
Compression, ball, ceramic disc, and cartridge faucets can leak due to different causes, so it’s important to know which faucet type you have.
The location of the leak can determine what the cause is. Often, leaks occur at the spout, around the handle, under the sink, or at the faucet base.
Homeowners can turn off the water supply, inspect the faucet, and replace basic components.
It’s essential to call a plumber if the leak won’t go away, there is severe corrosion, or the valve seat is damaged. You should also reach out when multiple faucets are dripping, or you suspect a shutoff valve leak.
The cost of repairs will vary based on the faucet type, replacement parts needed, labor costs, the accessibility of the fixture, and the level of corrosion.
Cleaning the aerator and performing routine maintenance can prevent leaks from occurring in the future.
Common Causes of a Faucet Dripping When Turned Off
Faucets can drip due to various reasons. Understanding the underlying cause is essential in determining the appropriate solution. Here are some common reasons why your faucet may be dripping.
Worn-Out Washer
One of the most common causes of a dripping faucet is a worn-out washer. These small rubber components are responsible for creating a watertight seal when the valve closes. They are commonly used in compression faucets.
Over time, friction causes wear, leading to leaks. This results in constant dripping from the spout. You’ll also likely notice that it takes extra force to turn the handle. Even with extra tightening, the leak may return. Fortunately, replacing a worn washer is a relatively simple and inexpensive repair that can resolve the dripping problem.
Damaged or Worn O-ring
The O-ring is a small rubber seal that is intended to stop leaks from happening around the handle and spout. It fits into a groove within the fixture.
Mechanical stress, improper installation, or normal wear can cause it to break down. When the O-ring is damaged, it can cause a leak. You’ll likely notice water leaking around the faucet handle or near the faucet base.
Faulty Faucet Cartridge
Modern single-handle faucets contain cartridges that control the temperature and the flow of water. When the cartridge is damaged, it fails to shut off completely.
As a result, you may notice continuous dripping from the faucet. The handle may feel loose, and it may be difficult to control the temperature. Often, the easiest option is to get a faucet cartridge replacement.
Corroded Valve Seat
Another culprit behind a dripping faucet is sediment buildup on the valve seats. The valve seat provides the surface against which the washer or valve seals to stop water flow. When mineral deposits and debris accumulate, they can cause corrosion and prevent the faucet from fully closing.
A corroded valve seat will be unable to seal properly. Cleaning or replacing the affected parts can eliminate the sediment and restore proper functionality to the faucet.
Damaged Faucet Aerator
The aerator is located at the tip of the faucet. Over time, mineral buildup can occur that affects the flow of water.
If this is the issue, you may notice sputtering when you turn on the tap, sideways water flow, or an uneven flow. It can cause a brief drip when you turn off the tap because it retains water. Cleaning and soaking the aerator in vinegar can help remove the buildup causing the issue.
High Water Pressure
Excessively high water pressure can put strain on the internal components of a faucet, leading to leaks. If your faucet drips when the water is turned off, it could be a sign of elevated water pressure. This is more likely to be the cause if you’re experiencing multiple dripping faucets and high pressure readings. Unusual pipe noises, such as loud thumping, vibrating, or banging noises, are also common.
Before we can fix this problem, the first step is getting an accurate diagnosis by testing the water pressure. Then, we can install a pressure regulator to regulate the water flow and prevent damage to your faucet.
Loose or Broken Faucet Parts
A faucet is composed of several moving parts, and if any of them become loose or worn out, it can cause leaks. Damaged or loose parts can disrupt the proper functioning of the faucet, resulting in leaks. For example, loose handles, internal fittings, or packing nuts are common issues.
By tightening or replacing the necessary components, you can stop the faucet from dripping. However, you should avoid overtightening as well because this could damage seals and internal components. If you can’t figure out which part is loose or broken, reach out to our plumbers for professional diagnostics.
Different Faucet Types and Why They Leak
There are four main types of faucets that you may have in your home. Each one is prone to specific types of problems, so you can narrow down the cause of the leak by understanding the faucet type.
Compression Faucets
A compression faucet is the old, traditional type of faucet. It has two separate handles for hot and cold water. When you turn the handle, it creates pressure against the washer. Eventually, this can result in leaks due to the washer failing.
Cartridge Faucets
A cartridge faucet has a plastic or brass stem that controls the flow of water inside the faucet. It may have one or two handles. With this option, the most common point of failure is the cartridge itself.
Ball Faucets
With a ball faucet, there is a single handle and an actual ball assembly inside that controls the flow of water. When a leak develops in a ball faucet, it is often because of a damaged O-ring or seal.
Ceramic Disc Faucets
This modern design has a single lever. Inside, two discs slide across each other to manage the temperature and amount of water. While these are incredibly sturdy faucets, mineral buildup over time can result in damaged seals and cartridges.
Where Is Your Faucet Leaking From?
One of the most effective ways to troubleshoot the source of the leak is by figuring out where it is coming from.
Leak Location
Possible Cause
Faucet spout
Washer, cartridge, or valve seat issues
Around the handle
Faulty O-ring or cartridge
Faucet base
Malfunctioning O-ring in the spout
Under the sink
Leaky supply line or connection
How To Fix a Dripping Faucet Yourself
As a homeowner, there are a few basic steps you can take to troubleshoot the problem. If these don’t fix the leaky faucet, you should reach out to our team for faucet repair services.
Turn off the water supply, then open the faucet to release any remaining pressure.
Remove the faucet handle using the correct tool, such as an Allen wrench or screwdriver.
Inspect components inside the faucet to see if they are worn or damaged. In particular, focus on the washer, cartridge, O-ring, and valve seat.
Replace worn parts as needed. Make sure to use an exact replacement.
Reassemble your faucet. When everything is together again, you may turn the water back on. Check to see if the leak has stopped.
When Should You Call a Plumber?
While minor issues can be resolved on your own, you should always reach out for professional help if you encounter any of the following issues.
The leak continues after you attempt to repair it.
Multiple faucets are dripping.
The valve seat is damaged.
The shutoff valve leaks.
There is severe corrosion.
The replacement parts are unavailable.
How Much Does Faucet Repair Cost?
The cost of repairs will depend on the faucet type, the replacement parts required, labor costs, how accessible the faucet is, and the level of corrosion. Before we perform any repairs, our team will carefully walk you through the recommended fix and how much it will cost. Central Oregon Heating, Cooling, Plumbing, & Electrical is committed to upfront pricing, so you will always know exactly how much everything will be.
Why You Should Repair the Faucet Right Away
Dealing with a dripping faucet may seem like a minor inconvenience, but it’s important to address the issue promptly. Here are several reasons why:
Prevents Water Waste: A dripping faucet can waste a significant amount of water over time. By fixing the issue, you can conserve water and contribute to a more sustainable environment.
Saves Money on Water Bills: A dripping faucet can lead to higher water bills, as you’re essentially paying for water that you’re not even using. Repairing the faucet can help you save money in the long run.
Prevents Further Damage to the Faucet: Ignoring a dripping faucet can lead to more extensive damage over time. By addressing the issue early on, you can prevent costly repairs or the need for a complete faucet replacement.
Promotes Overall Plumbing Efficiency: A properly functioning faucet improves the overall efficiency of your plumbing system. By repairing the dripping faucet, you ensure that water flows smoothly and avoid additional plumbing problems. If you notice recurring leaks, pressure issues, or other problems, professional plumbing services can help identify and address the underlying cause.
Keeps Mold and Mildew From Growing: Excess moisture from a dripping faucet can create a favorable environment for mold and mildew growth if the leak drains outside of the sink basin. By fixing the issue, you can prevent the development of these potentially harmful substances.
When a Full Replacement Makes More Sense
If the following situations are true, it may be better to replace the unit completely.
The Faucet Is Getting Older: Older faucets may have worn-out internal components that are difficult to repair. If your faucet is old or in poor condition, replacing it might be a more sensible choice.
Replacement Parts Are Hard To Find: When the necessary parts are not readily available, replacing the faucet could be the more practical solution.
It Requires Frequent Repairs: If the faucet requires frequent repairs, it may be more cost-effective to replace the faucet altogether.
There Is Extensive Corrosion: When corrosion is severe, you’ll likely need to replace more parts in the near future. At this point, it’s better to just replace the unit.
A New Faucet Will Improve Your Efficiency: If you’re concerned about water conservation, consider choosing a new faucet that is more water-efficient. Many modern faucets are designed to minimize water waste.
The total cost is also an important factor. You can review the cost of repairing the faucet compared to the cost of purchasing a new one. If the repair cost is similar or higher than the price of a new faucet, a replacement may be the better option.
Why You Should Hire a Certified Plumber To Fix a Dripping Faucet
A dripping faucet can be caused by more than a worn washer. Damaged cartridges, O-rings, valve seats, corrosion, and water-pressure issues can all lead to recurring leaks. A licensed plumber can identify the actual source of the problem, determine whether repair or replacement makes more sense, and complete the work using the appropriate parts and repair methods.
Central Oregon Heating, Cooling, Plumbing & Electrical has served Central Oregon since 1993, providing decades of local home-service experience. The company also maintains a 5-star rating from more than 6,500+ customer reviews, providing additional evidence of its established service record.
Our licensed plumbers serve homeowners throughout Bend, Redmond, and Central Oregon and can diagnose persistent faucet leaks, replace damaged components, and identify related plumbing problems that may otherwise go unnoticed. For recurring leaks, severe corrosion, damaged valve seats, or problems that remain after a DIY repair, a professional inspection can help determine the appropriate long-term solution.
How To Prevent Future Faucet Leaks
Once you fix a dripping faucet, it’s important to prevent the problem from recurring. As a homeowner, there are a few maintenance tasks you can perform to keep your system functioning at its best.
Clean the Aerator Regularly: Every few months, unscrew the aerator. You can rinse it out under a clean stream of water. For heavier mineral deposits, you can soak the aerator in vinegar.
Avoid Overtightening Handles: To avoid damaging internal valve seats and washers, you should never overtighten the handles.
Monitor Water Pressure: High water pressure can be damaging to your fixtures. If your home’s water pressure increases, a pressure regulator can be installed to prevent damage.
Replace Worn Seals Early: If you notice a minor drip or leak, replace the damaged O-ring or washer.
Remove Mineral Buildup: Parts that have heavy buildup can be soaked in vinegar to break down the minerals.
Frequently Asked Questions About Dripping Faucets
Can a dripping faucet increase my water bill?
Yes, a dripping faucet can lead to increased water consumption, resulting in higher water bills.
How can I determine the cause of a dripping faucet?
The cause of a dripping faucet can be determined by inspecting the internal components or hiring a certified plumber for a professional diagnosis.
Is it possible to fix a dripping faucet on my own?
Minor dripping faucet repairs can be done by homeowners, but more complex issues are best left to certified plumbers.
What should I do if my faucet continues to drip after repair?
If your faucet continues to drip after repair, it’s essential to contact a certified plumber to identify and resolve the underlying issue.
Can a dripping faucet cause water damage?
Yes, a dripping faucet can lead to water damage if left unaddressed for an extended period. It can cause mold growth, structural damage, and damage to surrounding fixtures.
How much water does a dripping faucet waste?
The amount of water wasted by a dripping faucet can vary, but even a slow drip can waste several gallons of water per day.
Are there any temporary fixes for a dripping faucet?
Temporary fixes, such as carefully tightening a loose component, can provide short-term relief, but a professional repair should be done to address the underlying cause.
Can a dripping faucet be a sign of other plumbing problems?
Yes, a dripping faucet can be a symptom of other plumbing issues, such as high water pressure or corroded pipes. A certified plumber can assess the situation and provide appropriate solutions.
How long should a faucet typically last before needing replacement?
The lifespan of a faucet can vary depending on usage, quality, and maintenance. On average, a faucet can last anywhere from 10 to 20 years.
What should I consider when choosing a new faucet?
When choosing a new faucet, consider factors such as style, functionality, water efficiency, and the reputation of the manufacturer.
Why does my faucet drip after replacing the washer?
You may have installed the incorrect washer size or type. This also commonly occurs if the valve seat is damaged or there is a worn O-ring.
Why is my faucet dripping from the handle?
Leaks around the handle often happen if there is a faulty O-ring or cartridge. When these issues occur, the water is able to bypass the valve and leak around the handle.
Why is my faucet leaking from the base?
Often, this occurs if there is an O-ring leaking in the spout. In most cases, replacing the O-ring will solve the problem.
Can I replace a faucet cartridge myself?
If you are mechanically inclined, you may be able to handle the faucet cartridge replacement on your own. Older faucets can be trickier because of the mineral buildup. When in doubt, it is always better to reach out for professional help.
How long does faucet repair take?
Most basic repairs take less than an hour to perform. Our team will diagnose your faucet issues and let you know how long we expect the repair to take.
Is a dripping faucet an emergency?
It can be, but it depends on how bad the dripping faucet is and where it is located. Any leak that occurs inside the walls, above the ceiling, or beneath the flooring of your home is a major emergency because of the water damage involved. Even minor leaks can lead to rust, so it’s a good idea to be proactive about repairing dripping faucets.
Should I repair or replace my faucet?
Deciding whether to repair or replace your faucet depends on the faucet age, repair history, cost, corrosion level, and part availability. In most cases, it makes sense to repair a new fixture that has a minimal history of repairs and limited corrosion. However, you may want a complete replacement if you cannot find replacement parts, the corrosion is extensive, or the faucet is getting old.
Get Professional Faucet Repair in Bend and Redmond For Your Home’s Plumbing Needs
At Central Oregon Heating, Cooling, Plumbing & Electrical, we have certified plumbers in Bend and Redmond ready to serve you. Give us a call or fill out our contact form to get an estimate for your plumbing needs. Whether you need to fix a leaky faucet or upgrade your home plumbing system, we are here for you.
Are you considering installing a well pump in your home? Well pumps are an essential component of any residential water system, providing a reliable and consistent water supply for your household needs. However, with various types of well pumps available in the market, it can be challenging to determine which one is the best fit for your home.
In this article, we will guide you through the process of choosing the right well pump for your home, considering factors such as well depth, water usage, pumping capacity, plumbing system compatibility, and power source availability. Before making a decision, it’s important to gather all the necessary information and consult with professionals to ensure you make the right choice.
How a Well Water Pump Supplies Your Home
A well water pump for a house moves groundwater from the well into the home’s plumbing system so water is available at sinks, showers, toilets, appliances, and other fixtures. The complete system may include the water well pump, pressure tank, pressure controls, piping, electrical components, and other equipment needed to maintain dependable water delivery.
When pumping water from a well, the right pump depends on more than the well itself. Well depth, available water, required flow, household demand, desired water pressure, plumbing configuration, and the distance the water must travel can all affect pump selection and performance.
What Is a Well Pump?
A well pump is a device that is used to extract water from an underground water source, typically a well. It plays a crucial role in delivering water to your home’s plumbing system, ensuring a constant supply of water for drinking, bathing, and other everyday activities.
Well pumps are installed deep below the ground, retrieving water from the well and pushing it up to your home. They come in various types, each with its own unique features and benefits. Understanding the different types of well pumps will help you make an informed decision when choosing the right one for your home.
Submersible vs. Jet Well Pumps: Which One Do You Need?
Choosing between a submersible and jet pump largely depends on well depth, system design, water demand, and the conditions of the property.
Factor
Submersible Well Pump
Jet Well Pump
Location
Installed inside the well
Usually installed above ground
Typical application
Common for deeper wells
Common for shallower wells; configurations vary
Operation
Pushes water toward the home
Uses suction to draw water
Noise
Usually quieter inside the home
Pump operation may be more noticeable
Service access
Requires accessing equipment in the well
Above-ground components may be easier to access
Selection
Based on depth, flow, and pressure requirements
Based heavily on well depth and configuration
Neither option is automatically better for every property. A plumber should evaluate the well and household requirements before determining which pump configuration is appropriate.
Well Depth, Flow Rate & Water Pressure
A properly selected water well pump needs to deliver enough water at usable pressure for the household’s normal demand. Pump selection therefore requires looking at several measurements together rather than choosing equipment based on horsepower alone.
Important factors include:
Well depth: Influences which pump designs are suitable for the property.
Water level: The pump must operate according to the actual water conditions within the well.
Required flow: Household fixtures and simultaneous water use affect how much water the system needs to deliver.
Water pressure: The pump and pressure system must provide usable pressure throughout the home’s plumbing.
Vertical lift: Moving water upward requires the pump to overcome elevation.
Distance to the house: Longer piping runs can affect system requirements.
Household demand: Larger households and homes with multiple water using fixtures may require greater capacity.
The goal is not simply to install the most powerful pump. The pump should be matched to the well and the home’s actual water requirements.
Types of Well Pumps
Jet Pumps
Jet pumps are a popular choice for residential water systems. They are versatile and can be used in both shallow and deep wells. Jet pumps work by creating suction to draw water from the well and then use pressure to push it up to your home. They are typically installed above ground and require a separate pressure tank to store the water.
Submersible Pumps
Submersible pumps are installed deep below the ground, submerged in the water well. They are designed to be completely waterproof and can operate efficiently even when fully submerged. Submersible pumps are known for their quiet operation and high pumping capacity. They are ideal for deep wells and can provide a constant water supply even at high pressures.
Shallow Pumps
Shallow pumps, as the name suggests, are suitable for shallow wells. They are typically installed above ground and can draw water from wells with a depth of up to 25 feet. Shallow pumps are cost-effective and easy to install, making them a popular choice for homeowners with shallow wells. However, they may not be suitable for areas with fluctuating water levels or high water demands.
Convertible Jet Pumps
Convertible jet pumps combine the features of jet pumps and submersible pumps, allowing them to be used in various well depths. They are versatile and can be easily adjusted to accommodate different water levels. Convertible jet pumps are capable of providing high pumping capacities and are suitable for both shallow and deep wells.
Centrifugal Pumps
Centrifugal pumps are commonly used in commercial and industrial settings but can also be suitable for residential applications. They work by using centrifugal force to move water from the well to your home. Centrifugal pumps are known for their high flow rates and are capable of handling large volumes of water. However, they may not be as efficient as other types of well pumps and may require more maintenance.
Booster Pumps
Booster pumps are used to increase the pressure of water in your plumbing system. They are typically installed in homes with low water pressure or in situations where additional pressure is required. Booster pumps can be used in conjunction with other types of well pumps to enhance their performance. They are designed to provide a consistent and reliable water supply.
What to Consider When Choosing the Right Well Pump for Your Home
Choosing the right well pump for your home is a decision that should be made after careful consideration of various factors. Here are some important points to keep in mind when selecting a well pump:
Well depth: The depth of your well will determine the type of pump you need. Shallow wells require pumps that are specifically designed for their depth, while deep wells require pumps with higher pumping capacities.
Total household water usage: Consider the amount of water your household consumes on a daily basis. This will help you determine the pumping capacity and flow rate requirements of the well pump you choose. It’s essential to ensure that the pump can meet your household’s water demands.
Pumping capacity and flow rate requirements: Different well pumps have varying pumping capacities and flow rates. It’s important to select a pump that can deliver the required amount of water at the desired pressure. Consider the number of fixtures in your home and the simultaneous water usage to determine the appropriate pumping capacity.
The best type of well for your plumbing system: Consider the type of well that is most suitable for your plumbing system. The depth and water source will play a significant role in determining the appropriate well pump. Consult with a professional plumber in Bend or Redmond to assess your well and recommend the best type of pump for your specific needs.
Power source availability and compatibility: Determine the power source available in your area and ensure that the well pump you choose is compatible with it. Some pumps may require electricity, while others can be powered by alternative sources such as solar energy or generators. Consider the availability and reliability of the power source to ensure an uninterrupted water supply.
By considering these factors, you can make an informed decision when choosing the right well pump for your home, ensuring a reliable and efficient water supply for your household’s needs. Need more guidance for your home’s plumbing needs? Give us a call at 541-227-6258 or fill out our contact form to get an estimate.
Signs Your Well Pump May Be Undersized or Failing
Problems with a well water pump do not always result in an immediate loss of water. Changes in pressure, cycling, noise, and water delivery can provide earlier warning that the pump or another part of the well plumbing system needs attention.
Watch for:
Low or declining water pressure
Pressure that fluctuates noticeably
Water stopping completely
Pump running longer than normal
Pump repeatedly turning on and off
Reduced water flow when several fixtures are used
Unusual pump or pressure system noises
Sudden changes in water delivery
Increasing electrical use associated with pump operation
These symptoms do not automatically mean the pump needs replacement. The cause may involve the pump, pressure tank, controls, piping, electrical components, well conditions, or another part of the system.
4 Things to Do Before Buying a Well Pump
Before purchasing a well pump, there are a few important steps you should take to ensure a smooth installation process and avoid any potential issues. Here are four things you should do before buying a well pump:
1. Consult a Certified Plumber
Consult with a certified plumber before purchasing a well pump. A professional plumber can assess your specific needs, evaluate your well, and recommend the most suitable pump for your home. They will consider factors such as well depth, water usage, and plumbing system compatibility to ensure you make the right choice. If you are in the Bend, Redmond, or Madras area, our certified plumbers in Central Oregon Heating, Cooling, Plumbing & Electrical are ready to help you with your plumbing needs.
2. Review Your Home Warranty
Review your home warranty to determine if it covers the installation or replacement of well pumps. Some warranties may have specific provisions for well pumps, and it’s essential to understand your coverage before making a purchase. If your warranty does not cover well pumps, you may need to consider purchasing additional coverage or budgeting for the cost of the pump separately.
3. Review Your Homeowners Insurance Policy
Check your homeowners’ insurance policy to see if it provides coverage for well pumps. Some policies may include coverage for well pumps as part of the overall property insurance. Understanding your insurance coverage can help you make an informed decision and avoid any surprises in case of damage or malfunction of the pump.
4. Check Local City Residential Plumbing or Building Codes
Before purchasing a well pump, it is crucial to check your local city’s residential plumbing or building codes. These codes may have specific regulations and requirements regarding the installation and operation of well pumps. Ensure that your chosen pump complies with these codes to avoid any legal or safety issues in the future.
Choosing a Well Pump for a Central Oregon Home
For homes in Bend, Redmond, and surrounding Central Oregon communities that rely on private wells, pump selection should reflect the conditions of the individual well and property. Well depth, water availability, elevation, distance between the well and house, household demand, and existing plumbing can differ considerably from one property to another. That is why selecting a residential well water pump should begin with the actual well and plumbing configuration. Central Oregon Heating, Cooling, Plumbing & Electrical can evaluate the system and help homeowners determine the appropriate pump type, capacity, pressure requirements, and related well plumbing needs.
Frequently Asked Questions About Well Pumps
How Long Does a Well Pump Last?
Well pump lifespan varies based on the pump type, system sizing, installation, usage, cycling frequency, water conditions, electrical conditions, and maintenance history. Rather than replacing a pump based on age alone, homeowners should consider its condition, performance, repair history, and the results of professional testing.
Can I install a well pump myself?
Well pump installation involves pump sizing, electrical connections, pressure controls, piping, well access, and system testing. Because improper installation can affect water delivery, equipment operation, and electrical safety, professional installation is generally appropriate for residential well systems.
How often should I test my well pump?
It is recommended to test your well pump annually to ensure it is functioning correctly. Regular testing can help identify any potential problems early on and prevent costly repairs or replacements.
What is the warranty period for well pumps?
The warranty period for well pumps varies depending on the manufacturer and model. It is essential to review the warranty terms and conditions before purchasing a well pump to understand your coverage.
Can I upgrade my existing well pump?
In some cases, it is possible to upgrade your existing well pump to a more efficient or powerful model. Consult with a professional plumber to assess your current setup and determine if an upgrade is feasible and beneficial.
What maintenance is required for well pumps?
Well system inspection and maintenance needs depend on the pump, pressure system, well conditions, water quality, usage, and manufacturer guidance. Homeowners should also arrange service when they notice pressure changes, unusual cycling, noise, reduced flow, or other changes in system performance.
Can a well pump be repaired, or does it need to be replaced?
In many cases, well pumps can be repaired if the issue is minor or easily fixable. However, if the pump is significantly damaged or reaching the end of its lifespan, replacement may be more cost effective in the long run.
What Affects the Cost of a Well Pump?
Well pump cost depends on the pump type and capacity, well depth, system configuration, pressure requirements, electrical work, piping, pressure tank needs, installation complexity, and whether existing equipment must be removed or replaced. A system evaluation is needed to determine the appropriate equipment and installation requirements for a specific property.
Can a Well Pump Be Used With a Water Filtration System?
Yes. A private well plumbing system can include water filtration or treatment equipment, but the well pump and water treatment system perform different functions. The pump delivers water from the well, while filtration or treatment equipment addresses specific water quality concerns.
Pump flow and pressure should be compatible with any treatment equipment installed in the plumbing system.
Installing a well pump for your home?
Central Oregon Heating, Cooling, Plumbing & Electrical offers services for residential water well pump systems and other plumbing needs. Give us a call at 541-227-6258 to get an estimate for your home plumbing needs. Our plumbers in Bend and Redmond can assist in sizing your well pump and choosing the best well pump system for your home.